Greetings and welcome to an over due, yet huge update on this build and others like it. When I first started this build it was a basic build with lights and electronics provided by my good friend Jack. The whole thing has evolved into much, much more. This is the first update in some time, but it covers a lot of area. Besides molding and casting clear parts for my friend's build I've went back and re-engineered many of the details and interiors and have added a new interior and new decals and transparencies. what you see below is all new work. New design on the Bridge, Shuttle Deck, or Hanger, the addition of new decals and the addition of a briefing room all though not all of it will be shown in this post. I've also taken an old Vulcan Shuttle and totally reworked it, bought another kit to have replacement parts and have designed and build a new base for the Shuttle. There will be more to show later, but for now, here are many of the new additions to this build set.
Below you will see, brand new construction of 350th scale sets that are going into this model.


I've redesigned the bridge, the shuttlebay, reworked the graphics, made new decals, added a 1/2 scale Dedication Plaque and much more. Additionaly, I've designed a new IDIC base for the Shuttle and have repainted it as well. Am currently in the process of adding the new decals and finishing it up.


The original post follows...
Well, here we are years later and Polar Lights Round2 has finally gotten their version of the 350th TOS Enterprise to market. As some of you may know, Myself and AW Studios had more than one version of this ship, at this scale available since 2006-2007. Unfortunately due to smack talking idiots and liars and keyboard commandos, elitist jerks and moderators of forums that can't even moderate their own actions and so on.... We were unable to market more than of few of our garage kit version.
Now, having said all that, I decided to look at this kit with objectivity and to view it's characteristics with a degree of logic, rationality and pragmatism. I had to get one of these kits to do a comparison and not have to rely on a 2nd, or third party.
So, what's ahead is what I feel is a logical and rational review of the kit and it's contents and not some fan-boy's slavering, gushing, fangasm. After that I will do a comparison of "Our" kit, the kit that we had available to the community for more than six years. I'll also be doing a build of this ship and creating and selling lighting kits and other ancillary items to dress this kit up and make it glow.
First the price... $150.00 U.S. Now, if I recall correctly the original price, with all of the "Go Fasters" was supposed to be about $100.00 and that price was supposed to include everything! What I expected was exactly that, something that was much the same as the 1/1000 TOS Enterprise, only with lights and spinnys. That's not what ended up coming out, what came out was a base kit for $150.00 with ZERO Extras. Originally we were supposed to be able to build all three versions of the TOS Enterprise and it's variants with one kit. Nope, what you get is a base kit for the exorbitant price (especially in this economy) of $150.00.... I got a real good deal on this and did not pay retail, or I would not have bought it.
At any rate, here's the OOB review....
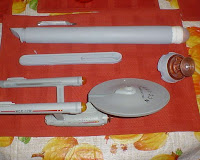
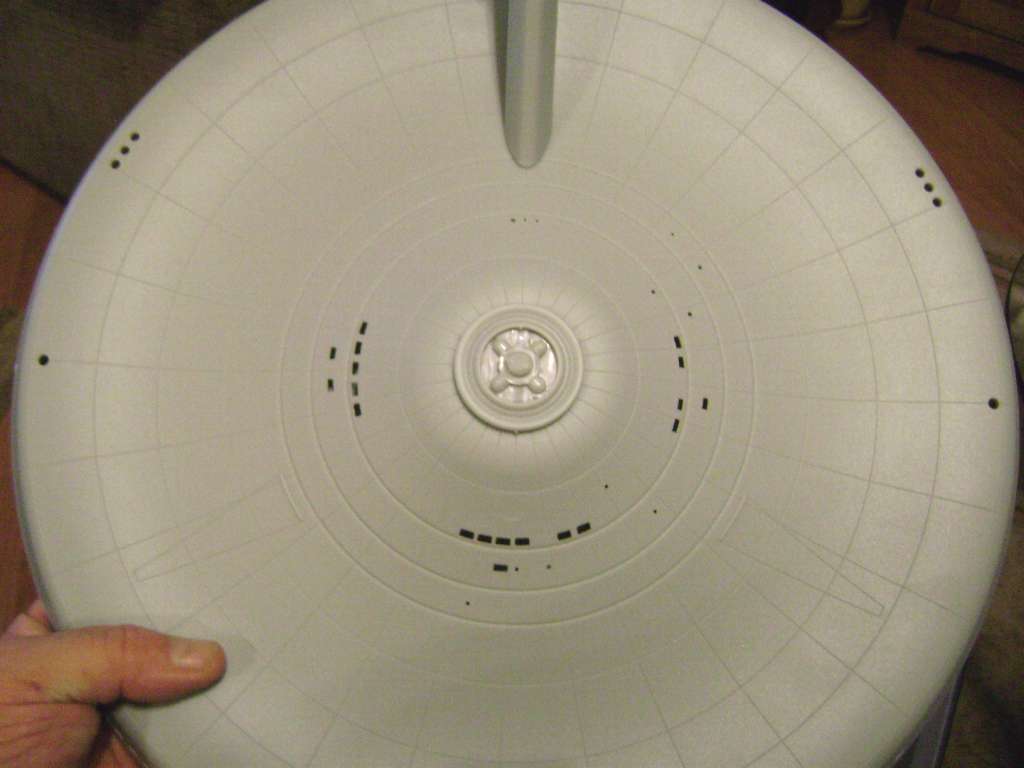
The box showed up at my house via UPS Ground thanks to the vendor that sold it to me and I brought it into the living room and looked at the box and I thought.. "Nice box art" But hey, box art does not a kit make... Right??? I opened the box and looked at the parts and wonder where the Pilot Enterprise parts were, then I saw the directions and noted that you had to buy other add-on kits and not just one, but two separate kits and I thought "Wow, that's a bummer..." I checked out the decals and thought... "Are you kidding me? One sheet? Where are the decals for the Mirror Universe and all of that..?" You see, when we were going to put our kit out we were going to have all of the decals done by JT Graphics and his decals had everything and there were four sheets, the main decals, all of the windows and then the MU stuff. Wow, just wow...??? After that I started looking closely at the parts and saw the grid lines on the upper and lower primary hull... My first thought was "What the Hell? You can barely see those lines on an eleven foot model with a high res screen grab, why did they put those there....??? As it was at the time that the ship came out I had not been one of the gushing fools that spends all of their time on the net waiting with anticipation of this thing and had not been foolish enough to kit involved in the fan-boy hype and the membership thingy and all of that nonsense. I've got other things in life to do, so I was not aware of anything more than rumor. When I saw the grid lines I thought it was going to take a lot of work to get them to totally disappear and still maintain some details that you wanted. I also considered all of the work it was going to be to carve out all of the flash and remove the sprue from the parts.
Below are some photos of my experience up to that point...


Let me say something positive about the kit.... That windows on the primary parts are crisp and clean and look to be correct. I did not take a micrometer to this ship like some of the more obsessive fans... LOL!
I dry fit most of the main body parts together and for the most part it's a superior kit to the Refit of the same mfgr.
Having said that, there are some drawbacks to the construction and assembly and there were some decisions made that I don't understand, more on that later.
More pics below...
As you can see, in the above photos, between the upper and lower primary hull, the engineering hull and the nacelles, the sprue and flash require a lot of work to get clean and to make for a good fit. Sorry, but that is another mark in the "Con" list.
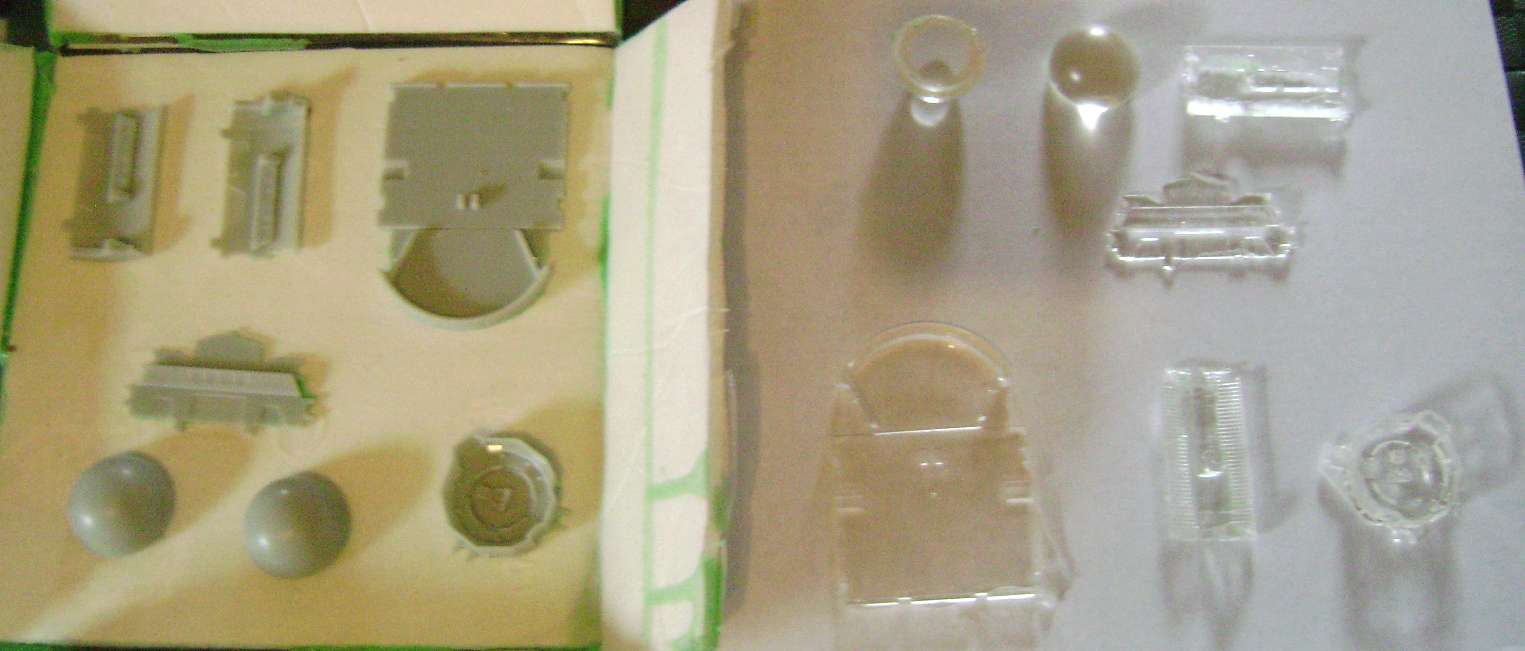
As you can see in one of the above photos I'm going to choose to cast a couple of parts in clear that were not cast thusly.
There's much more to come as I compare our garage kit to this expensive, mass produced (in China) kit.....
Stay tuned, this blog will be updated and edited as I do the compare and contrast and work on the build. ;)
....aaaannnnnnddddd We're back! woot!
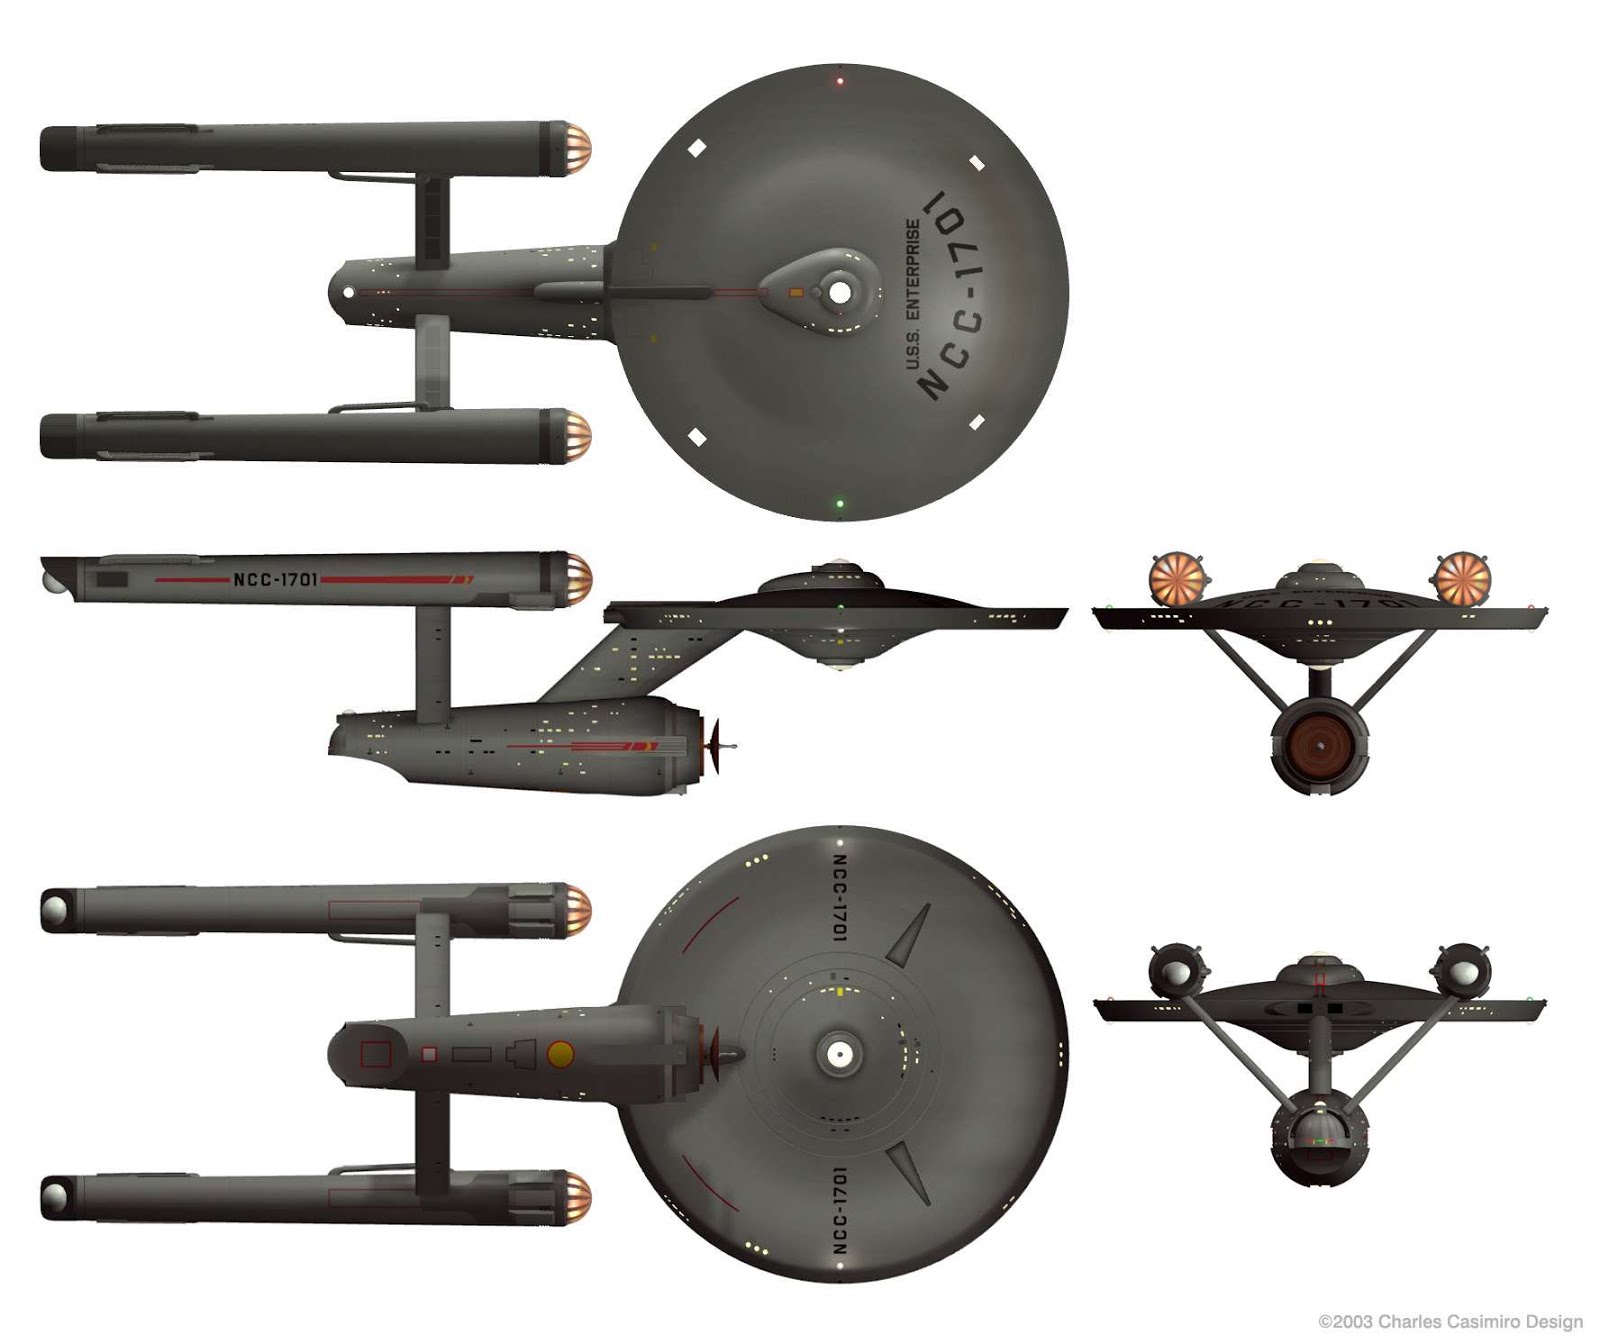
I love it when I see the dweebs on the net start talking about "accuracy" it's at this point that I like to remind them what the original ship looked like. Please enjoy the three pics below, I will be reffereing back to these pictures and references often. LOL!


You see that smiling face in the picture below? That's me, grinning my ass off because I was able to get a set of working masters together in a matter of weeks and with the help of AW Studios I had a set of vacuum pulls and a prototype kit together a few weeks later. That's the first prototype I'm holding, before we made any changes, or improvements. See why I was grinning, that was SIX YEARS AGO! LOL! I'm still laughing at all of the smack talking idiots! The next picture shows some of my other work and the last picture shows AW Studios working up the shuttlebay!
As I said earlier, I've dry fit most of the parts and all I can say is... Droopy, droopy, droopy.... You see those grid lines, that's after two days of priming and sanding and so on.. I can see that I'm going to have to reinforce the pylons and connections.
I've had my own custom name decals for some time and I'm going to start selling them again. I'm even sending some samples to a few friends. Notice the inner nacelle grill pattern. We had that laser cut back in 2007.
Back to the build up... The nacelles are a pain. Besides the excessive left over sprue, they were warped and I taped them together and two days later they were still warped when I pulled off the tape to prime them.
Now, let's do a little comparison and look at those grid lines again, after even more priming and sanding.
Remember, all of the masters that I made were made by hand and myself and AW Studios worked every aspect of this ship. How do you like the way hand made parts match up to "Pro Fesh Ional" parts? LOL ROTFLMAO!
Below you will see some more compare and contrast pictures as well as some early development shots of what was the prototype parts that we had available. Additionally, you'll see some ancillary items, some laser etched items and finally, I get back into the build of the PL Kit....


What follows below is a bit more of the compare and contrast and well as a bit more of the build. I used flat black enamel to opaque all of the parts and areas where there might be light leaks on the PL kit, then went over that with primer grey and after that, flat white. A good coat of flat white will reflect and refract lighting much better than a chrome surface. Don't believe me? I'll show proof. ;)
In some of the pictures below, you'll see the PL parts on the left and our parts from our kit, from 6 years ago, on the right. Some of the detail may not show through, but I will get close up shots later.


Now, can you believe that a bunch of douche bags did their best to keep our kit from ever getting to market and not only that, but have spent the better part of six years trying to destroy my name, talk smack about the ship, assault anyone that backed me, flash bombed websites to get me banned, stalked me from forum to forum and "Made it their Mission in Life to Shut Him [me] Down? What kind of personality spends all of their time trying to destroy someone else? Much more to come, much, much more to come.
You can see below that our eningeering hull was a pretty good comparison for the Pl kit with the caveat that we had to compensate for the .080 styrene sheet that we were using to pull across the vacuum bucks. Alternately, we had a clear cast resin version available that was cast from a finished engineering hull. The rest of the pics show the dry fit main components used to decide where to strengthen sheer and stress loads to keep the assmbled model from drooping once it's done. I can see that it's going to take a lot of work. We didn't have a problem with ours because we designed it right. LOL! The nacelles are still warped and frankly, I think the stand is weak and a joke, so I'm going to make my own.


I just found another flaw in the directions / color guide of the PL kit, but I'll get to that a little later. Right now I want to show some more of what was "Our" kit. These are the precision laser cut and laser etched parts that were available from 07, you'll also see fresh vacuum pulls. I revel in showing this stuff and in having a venue to do it. I revel in it because I love shoving in right in the face of all of the jerk wads that did their best to remove every mention of me from the net and WonderFest 09. Sniveling cowards that they are. LOL!
As usual.... Much, much, more to come. =/\=
If you look at the screencaps and compare with the Pl paint guide, you can see that the paint guide is clearly wrong. Yet another tick mark in the "Cons" section of the Pros and Cons chart... Tsk, tsk. Back to the build. As you can see below I've got the interior matted out white for lighting and I've done a preliminary light test. I'm looking to see that there are no areas where light shows through, before assembly.


You can clearly see that the pylons and nacelles are going to need strengthening to keep aways a bad case of the droopys.
I've been working on electronics in this blog in another posting, but I want to bring some of it into this one. I've been working on electrical and electronics for close to three decades and I still use a resistor finder to find the right value. Even though I know the nemonic by heart, I stil want to make sure. It's like the saying in carpentry "Measure Twice, Cut Once." In this case it's get the value right the first time. Something as simple as the wrong value resistor in a circuit can cause all sorts of problems.
"Let there be lights"


Though I took a few days off to do some real life stuff, I've never stopped working on the 305th TOS Enterprise and have in fact continued to evaluate the kit and compare it to what we had available to the public for more than six years. Below you will find more work on the craft as well as some great references material and screen captures that prove various statements already made, or to soon be added to this particular blog posting.
I've contiued with painting the various parts of the ship while many of the parts are still on the trees. I've also been planning out the electronics and verifying some of the different paint tones and colors. This kit has many parts that were injection molded with a decidedly greenish hue to them. This is puzzling and reminds me of when someone was running around the net telling everyone that the nacelle caps were painted "Watermelon." A funny thin about this kit is that they made the expenditure to form everyone one of the windows in clear and black and a milky white...??? I suppose this was for the builder, but I can't quite understand why they didn't instead include the parts for the different pilots over this? Also, I can clearly see that I'm going to have to mold some of the parts, so that I can cast them in clear. I'll probably come up with my own details for the pilots as well. Might as well, I'm doing my own electronics circuits. I don't feel like getting $500.00 into ancillary parts and stuff when I can make my own. One of the vendors that I tried to do business with tried to tell me that our bridge and BC deck were of the wrong shape, I did a comparison shot below to prove that it / they were not. Ours was slightly larger, but that's about it


I haven't updated this in a couple of weeks, so here we go... I've been working on a gold laminated original series dedication plaque as well as a few other projects, so I got away from the PL kit.


At any rate, I've been sanding and working on getting rid of those grid lines, I've also set up some parts to cast in clear, especially the shuttle-bay... I've also been chroming the inner nacelle detail and painting the main hull components with the proper color grey. That Rustoleum is the exact color for the exterior body and when allowed to cure makes for an easily sandable surface.


OK, here are some more update shots. I don't have time to go into a narrative at this time, so the pictures pretty much speak for themselves. Suffice to say, I've found more contradictions and fit issues.


Below are some more pictures of both the build and some compare and contrast, there is an added extra variable in the mix. I've included a couple of shots of Commander Max's S-Curve for a ship that he was working on in an effort to sublimate me. The funny thing is that the files he used were directly, or in directly from the stl files used to create the Master Replicas 1/350th TOS Toy. If you look at our parts, for our ship and compare them to the stolen stl files and the Polar Lights part, you can make your own conclusions. BTW, CMDR Max uses the same methods I do to create ships and props with one exception, he doesn't create masters by hand. LOL!


Got some more work done on the 350th.... More pictures, no narractive.


Got a bit more work done on the TOS the last few days. I'm still working on the electronics and sound board developement, but I've also been working on the detail parts, the main base and molding and casting parts in clear, for lighting. I picked up a set of stainless steel lamps one each for the Refit and TOS builds. They will go inside the base and will secure the ship to the base and provide a path for the electronics. I've also been working on remote control circuits for both builds.... More to come.


Even more Pretty pictures.... Woohoo! Imagine how cool the bridge and shuttle bay are going to look fully backlit and I didn't have to spend another $150.00 on BS PL parts.


I've been working on the bridge detail some more.....


I'll be using graphics from the card model that I developed for decals and transparencies.
Don't you love when things keep coming full circle. This is an homage to the card modelers.


More work on the TOS, notice the grean hue on the other kit freash out of the box. When watching the original series I always thought that the hemispheres on the S-curve of the nacelles were lit, so I did a light test on them to check it out. Notice the new roof of the shuttlebay. I let that sure and started sanding it with 600 grit to give it the look of the roof of the original. Can't wait to get this painted up and put together and lit.


Check out the new enamel paints I've discovered. I didn't put on gloves before painting, so instead of Gold Finger, I'm Copper Thumb. Note: The small jars are acrylics.


As with everything else, I'm behind updating this thread. I've been working on getting the main hull components finalized, working on details and working on some weathering and decals. I continuously refer back to Greg Jein's Enterprise, the original and screen captures from the show....


Even more cool updates and a couple of comparisons to the Pilot version....


I suppose that to the 500 or so people that are following this that I'm waaaay behind in updating this, so without further ado, I shall saunter on. BTW, I've seen some of the douche-bag videos from the sycophants and I have to say, they pull a hell of a vacuum when it comes to sucking PL's member.
At any rate, here's some recent work....
My client wants the nacelle pylons to light up, so I frosted the pylon lighting inserts like the rest to the window parts...
Once again I'm behind in updating this blog post. Unfortunately, there have been a lot real life and other issues that have taken precedence and I have just recently gotten caught up with some of the other builds and priorities around the house. At any rate, without further ado... I've shot clear lacquer over the main parts in preparation of applying the decals. I'm also preparing to finish up most of the lighting.....


Added new pics....


Added new pics....


Even more new updates..... Woohoo!


Haven't updated this in quite awhile, so here we go... Should be finishing this up real soon.


 I've redesigned the bridge, the shuttlebay, reworked the graphics, made new decals, added a 1/2 scale Dedication Plaque and much more. Additionaly, I've designed a new IDIC base for the Shuttle and have repainted it as well. Am currently in the process of adding the new decals and finishing it up.


 At any rate, I've been sanding and working on getting rid of those grid lines, I've also set up some parts to cast in clear, especially the shuttle-bay... I've also been chroming the inner nacelle detail and painting the main hull components with the proper color grey. That Rustoleum is the exact color for the exterior body and when allowed to cure makes for an easily sandable surface.


 OK, here are some more update shots. I don't have time to go into a narrative at this time, so the pictures pretty much speak for themselves. Suffice to say, I've found more contradictions and fit issues.


 Below are some more pictures of both the build and some compare and contrast, there is an added extra variable in the mix. I've included a couple of shots of Commander Max's S-Curve for a ship that he was working on in an effort to sublimate me. The funny thing is that the files he used were directly, or in directly from the stl files used to create the Master Replicas 1/350th TOS Toy. If you look at our parts, for our ship and compare them to the stolen stl files and the Polar Lights part, you can make your own conclusions. BTW, CMDR Max uses the same methods I do to create ships and props with one exception, he doesn't create masters by hand. LOL!


 Got some more work done on the 350th.... More pictures, no narractive.


 Got a bit more work done on the TOS the last few days. I'm still working on the electronics and sound board developement, but I've also been working on the detail parts, the main base and molding and casting parts in clear, for lighting. I picked up a set of stainless steel lamps one each for the Refit and TOS builds. They will go inside the base and will secure the ship to the base and provide a path for the electronics. I've also been working on remote control circuits for both builds.... More to come.


 More work on the TOS, notice the grean hue on the other kit freash out of the box. When watching the original series I always thought that the hemispheres on the S-curve of the nacelles were lit, so I did a light test on them to check it out. Notice the new roof of the shuttlebay. I let that sure and started sanding it with 600 grit to give it the look of the roof of the original. Can't wait to get this painted up and put together and lit.


 Check out the new enamel paints I've discovered. I didn't put on gloves before painting, so instead of Gold Finger, I'm Copper Thumb. Note: The small jars are acrylics.


 I suppose that to the 500 or so people that are following this that I'm waaaay behind in updating this, so without further ado, I shall saunter on. BTW, I've seen some of the douche-bag videos from the sycophants and I have to say, they pull a hell of a vacuum when it comes to sucking PL's member.
At any rate, here's some recent work....
My client wants the nacelle pylons to light up, so I frosted the pylon lighting inserts like the rest to the window parts...
I suppose that to the 500 or so people that are following this that I'm waaaay behind in updating this, so without further ado, I shall saunter on. BTW, I've seen some of the douche-bag videos from the sycophants and I have to say, they pull a hell of a vacuum when it comes to sucking PL's member.
At any rate, here's some recent work....
My client wants the nacelle pylons to light up, so I frosted the pylon lighting inserts like the rest to the window parts...


